Ashlar-Vellum L2TP VPN Setup Guide
(Fallback for Graphite v12 on macOS Mojave)
This guide provides instructions for setting up an L2TP/IPsec VPN connection. This is a fallback solution specifically for our Graphite v12 customers on macOS Mojave (10.14) who are experiencing network firewall restrictions that prevent software licensing.
While IKEv2 VPNs are generally preferred for modern operating systems, our testing has shown that IKEv2 client functionality on macOS Mojave (10.14) can be unreliable with many VPN server configurations. Therefore, for macOS Mojave users facing licensing communication issues, this L2TP guide offers an alternative method. Our primary IKEv2 guide is available at verify-vpn-tunnel-guide.ashlar.com and may work for other macOS versions.
You should use this L2TP guide if the following conditions are met:
- You are using Graphite v12 on macOS Mojave (10.14).
- Your IT department or network administrator cannot configure your network firewall to allow direct, bidirectional communication for Ashlar-Vellum licensing data on TCP port 80 to and from
verify.ashlarvellum.biz.
If these conditions apply, this L2TP VPN will help your Ashlar-Vellum Graphite v12 software communicate with our licensing server at verify.ashlarvellum.biz. Ideally, you should only need to connect to this VPN when Graphite v12 indicates it cannot reach the licensing server, and disconnect it after licensing is successful. This solution is intended for a very small percentage of users (estimated at less than 0.1%).
Important: This VPN must be configured to NOT send all your internet traffic through the VPN (this is often called "split-tunneling"). Only traffic intended for Ashlar-Vellum services (specifically licensing) will use the VPN.
Alternative Licensing Option: Hardware Key
If VPN solutions are not suitable for your environment, Ashlar-Vellum also offers a hardware key (dongle) option for software licensing. This uses CodeMeter technology from Wibu.com. Please note that this option may involve an additional cost. Contact support@ashlar.com or your sales representative for more details.
L2TP VPN Connection Details:
Please contact support@ashlar.com to obtain the required Username, Password, and Pre-shared Key for the L2TP VPN.
- Server Address / VPN Server:
verify-vpn.ashlar.com(This is the L2TP server IP: 69.13.42.135) - VPN Type: L2TP/IPsec with Pre-shared Key
- Account Name / Username:
[Provided by Support] - Password:
[Provided by Support] - Pre-shared Key / Shared Secret:
[Provided by Support]
Connecting on macOS Mojave (10.14) for Graphite v12
The L2TP setup process on macOS Mojave uses "System Preferences".
-
Open Network Preferences:
Click the Apple menu > System Preferences.... Then click on Network.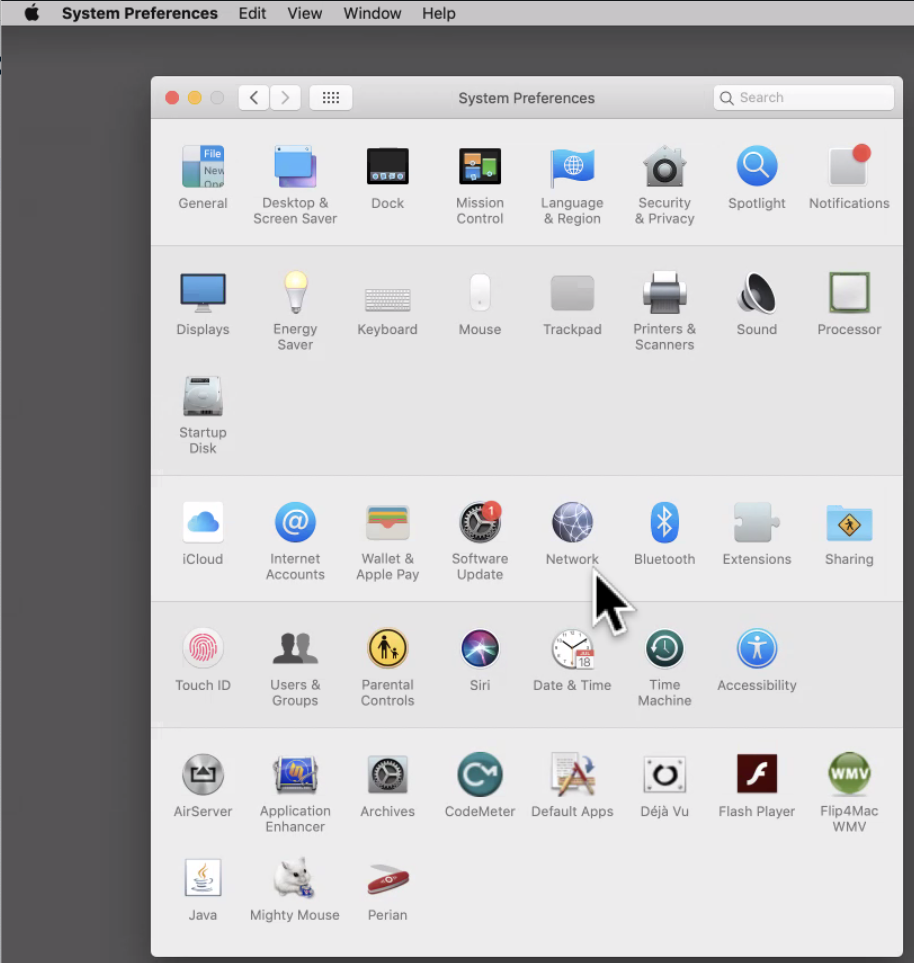
-
Add a new VPN Service:
Click the "+" button (at the bottom left of the network services list).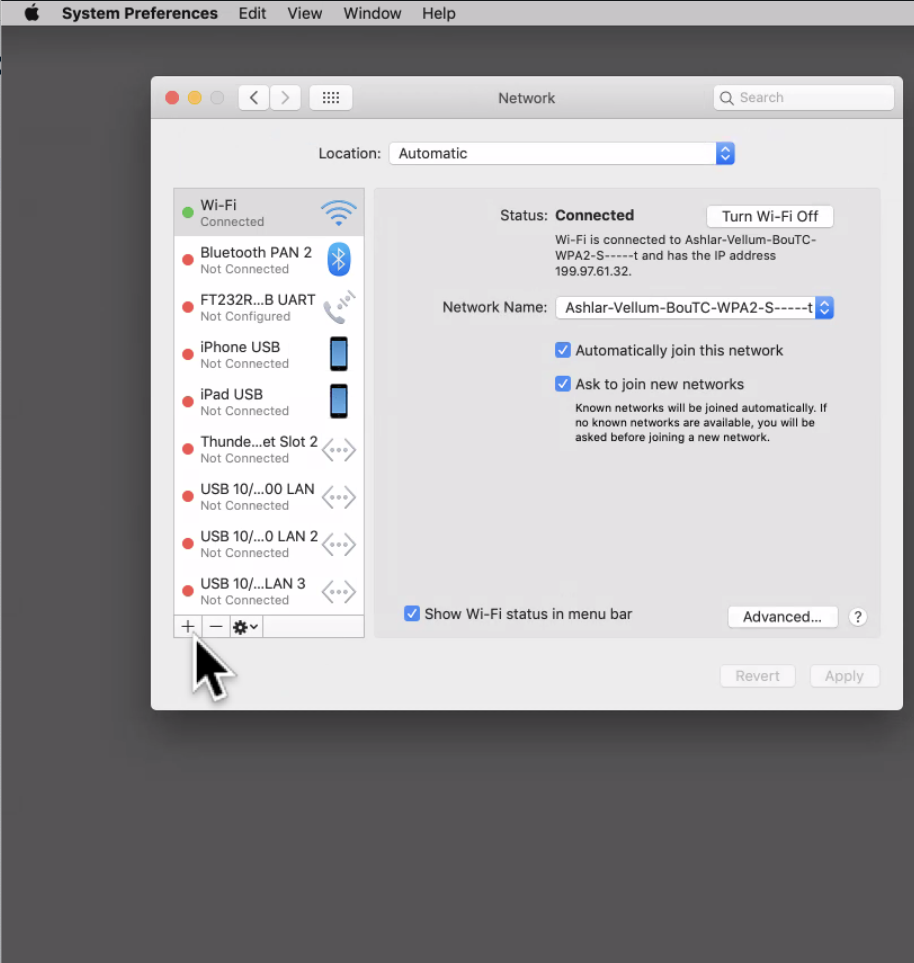
A dialog will appear. For **Interface**, select **VPN**. For **VPN Type**, select **L2TP over IPSec**.
For **Service Name**, type a descriptive name, e.g.,Ashlar-Vellum L2TP. Click Create.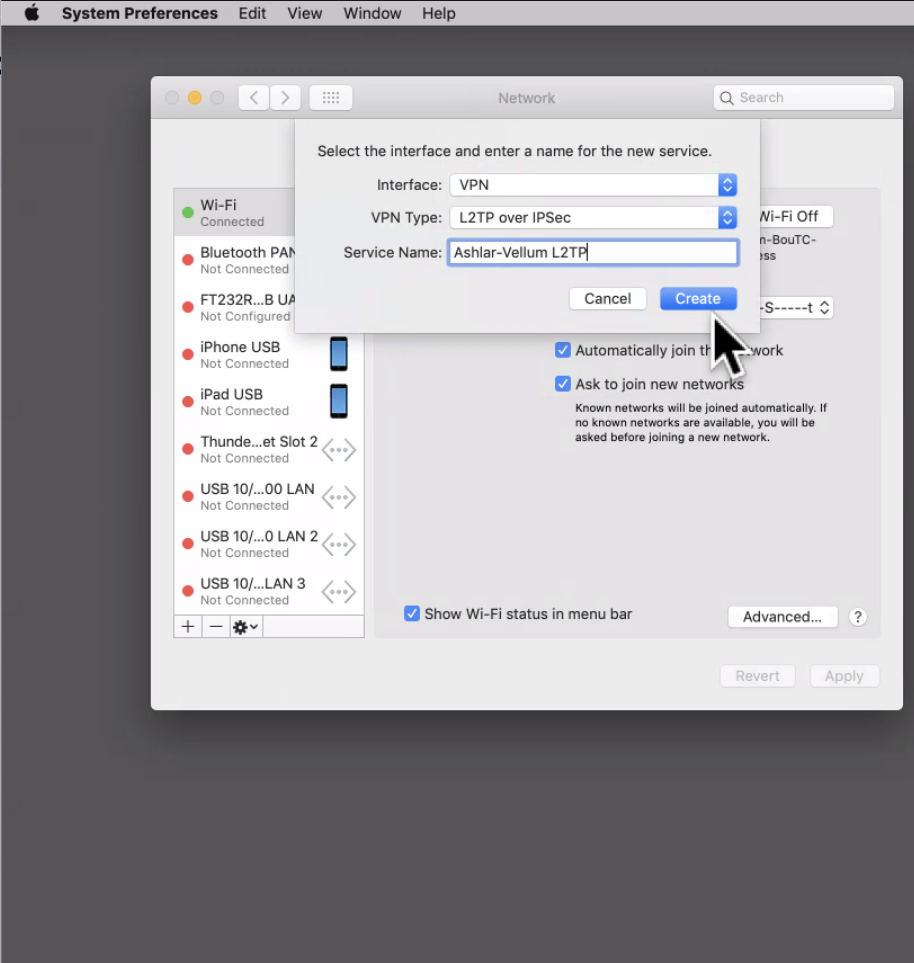
-
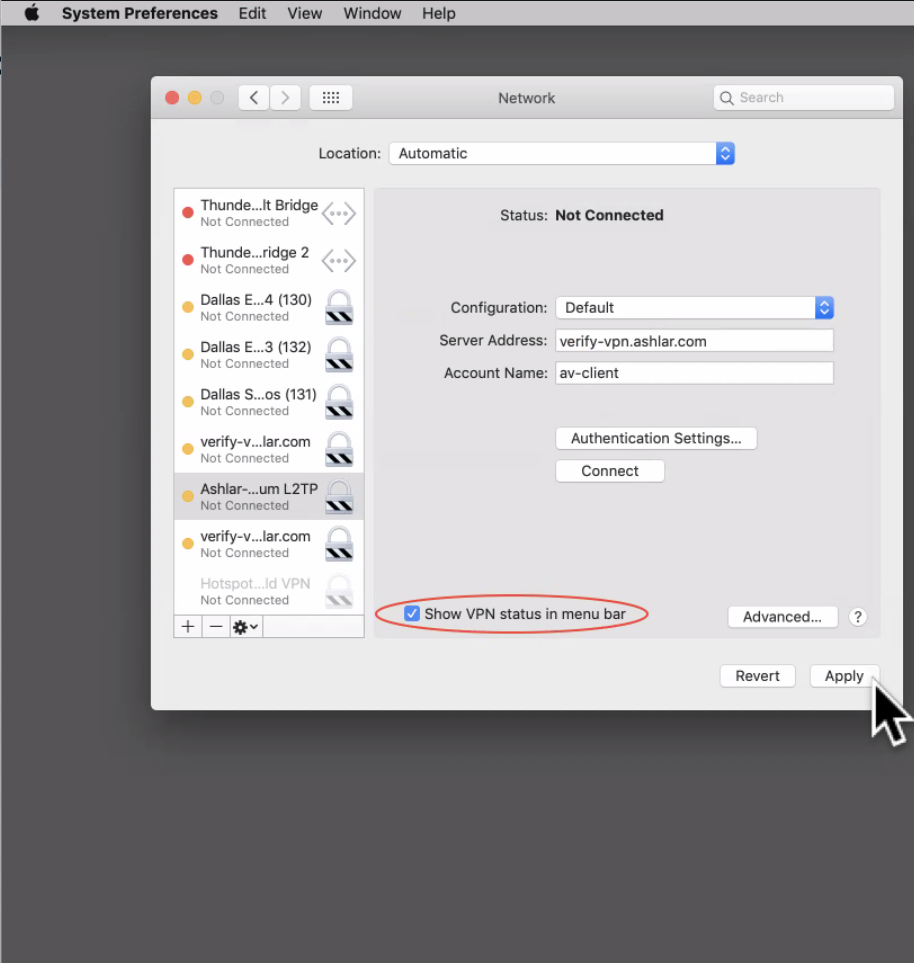
Configure Server and Account Details:
The new VPN service will be selected. Enter the following:- Server Address:
verify-vpn.ashlar.com - Account Name:
[Enter Username Provided by Support]

- Server Address:
-
Enter Authentication Settings:
Click the "Authentication Settings..." button.
In the sheet that appears:- Under "User Authentication", enter the **Password:**
[Enter Password Provided by Support] - Under "Machine Authentication", select **Shared Secret** and enter:
[Enter Shared Secret Provided by Support]

- Under "User Authentication", enter the **Password:**
-
Advanced Settings (Crucial for Split Tunneling):
Click the "Advanced..." button.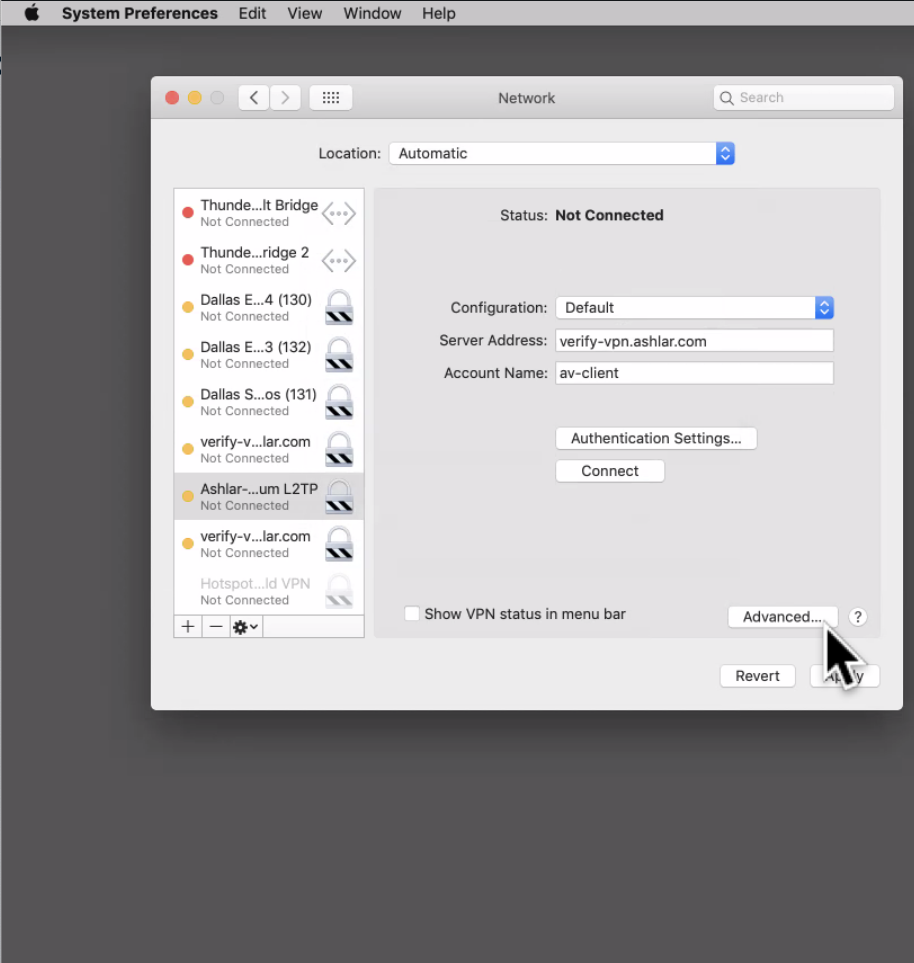
In the Advanced options, under the "Options" tab, **UNCHECK** the box that says "Send all traffic over VPN connection".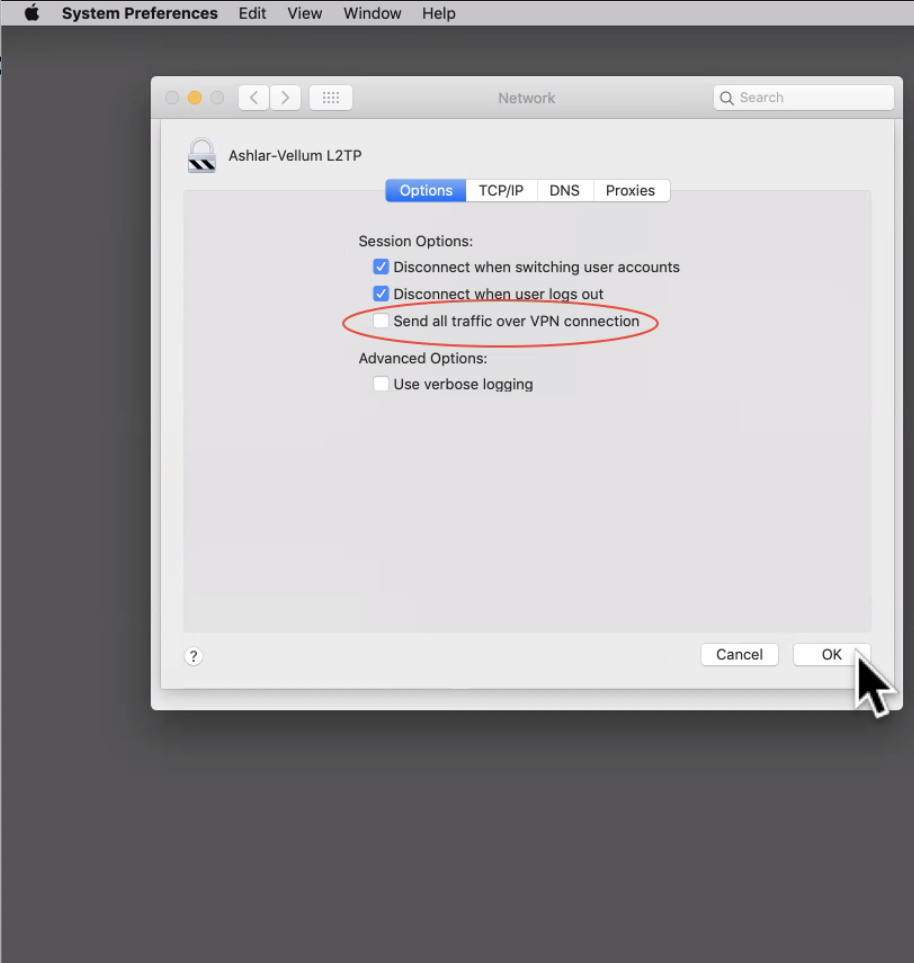
Click OK. -
Apply and Connect:
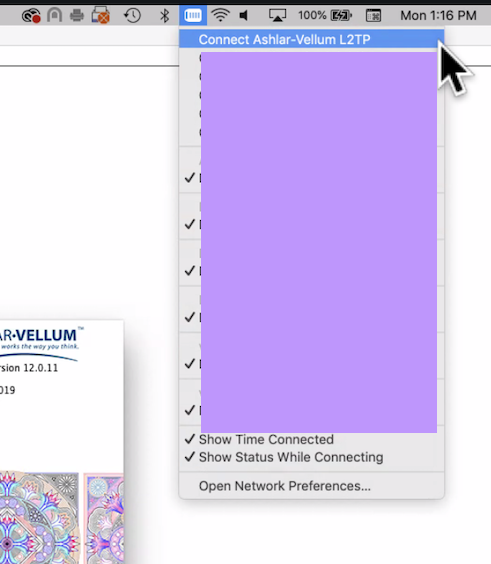
Back in the main Network settings window for your L2TP connection:- Optionally, check **"Show VPN status in menu bar"** for easy access to connect/disconnect. If you enable this, you can connect via the menu bar as shown below, or disconnect from there as well.
- Click **Apply** (in the bottom-right corner of the Network window).
- Then, click **Connect** in the Network window (or use the menu bar icon if enabled) when you need to use the VPN for licensing.
Troubleshooting
- Cannot Connect / Authentication Fails: Double-check all entered details: Server Address, Account Name, Password, and especially the Pre-shared Key (it's case-sensitive). Ensure you have the correct credentials from support.
- "Server did not respond" or similar: Ensure
verify-vpn.ashlar.comis reachable from your network. The issue could also be a local firewall blocking L2TP/IPsec ports (UDP 500, 4500, 1701). This L2TP VPN is intended for when such blocks exist for direct traffic but hopefully not for VPN traffic. - Software still doesn't license:
- Confirm the VPN is connected (check VPN status in menu bar if you enabled it).
- Confirm that the
config.inifile was updated by the Terminal command. If unsure, contact support. - Ensure "Send all traffic over VPN connection" is UNCHECKED in the VPN's advanced settings.
- Try launching Graphite v12 *after* connecting to the VPN.
- Remember to disconnect the VPN via the menu bar icon (if enabled) or System Preferences > Network once licensing is successful to ensure your general internet traffic is not unnecessarily routed.
- If you continue to experience problems after trying these steps, or if you are interested in the hardware key option, please contact support@ashlar.com.